How to Install Duct Heaters?
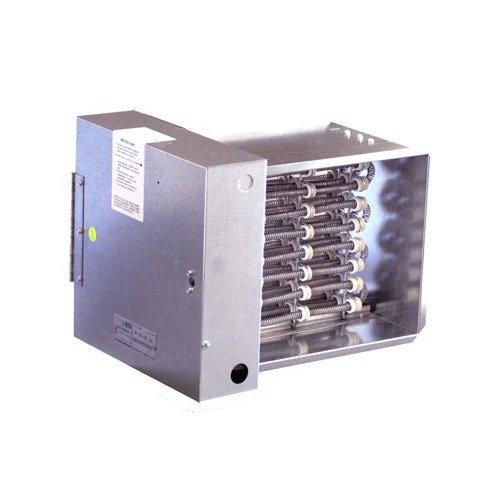
Do you want to make sure your home stays warm and cozy during the cold months? Install duct heaters can help your heating system work better and keep you comfortable. Duct heaters are a great addition to your heating system, whether you have a heat pump, air conditioner, or another forced air system. They come with all the necessary controls and can handle up to 600 volts, making them a reliable choice for your home.
In this guide, we’ll walk you through everything you need to know, from understanding what duct heaters are to installing them step-by-step. By the end, you’ll be ready to install your duct heater and enjoy a warm, comfortable home all winter long. Let’s dive in and get started!
What Is the Working Principle of a Duct Heater?
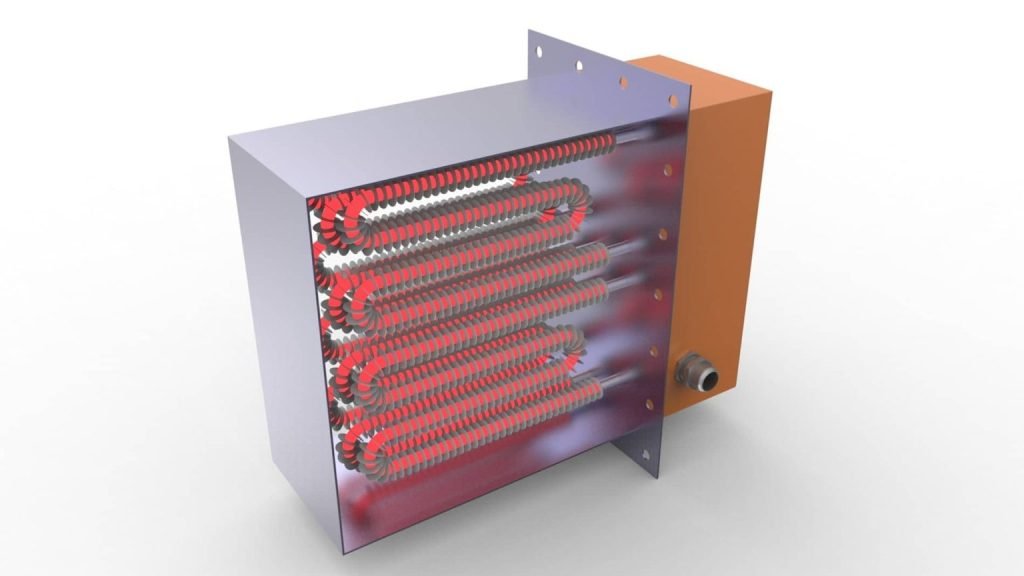
A duct heater works by using stainless steel electric heating tubes as its core heating element. Inside the heater, several baffles or guide plates direct the flow of gas, increasing its residence time in the heater. This ensures that the gas heating as it passes through, improving heat exchange efficiency. The heating tube has many electric heating wires, surrounded by magnesium oxide powder, which effectively conducts heat and provides insulation.
Heat is produced inside the tubes when electric current passes through the high-temperature resistance wire. The surface of the heating tube then receives this heat after passing through the magnesium oxide powder. The temperature of the gas passing through the duct can essentially rais from the hot surface warming it.
How to Select the Right Duct Heater?
Choosing the right duct heater is essential for ensuring efficient heating in your HVAC system. Here are the key steps to follow:
Determine Maximum Operating Temperature
Identify the highest temperature the heater’s sheath can safely reach. This is crucial because operating the heater within safe temperature limits prevents overheating and ensures longevity. By knowing the maximum operating temperature, you can select a heater that matches your system’s requirements and operates safely.
Calculate Heating Capacity
Measure the thermal energy the heater needs to deliver over a period, usually in kilowatts (kW). This involves calculating the wattage requirements based on the size of the space and the desired temperature rise. Accurately determining the heating capacity ensures the heater can provide sufficient warmth without overworked, leading to efficient and effective heating.
Assess Maximum Air Flow
Determine the heater’s airflow capacity, which defines the volume of space it can heat. The airflow rate is important because it dictates how quickly and evenly the heater can distribute heat throughout the area. Ensuring the heater can handle the required airflow helps maintain a consistent and comfortable temperature.
Measure Dimensions
Ensure the heater fits the ductwork dimensions by measuring the height, width, and depth required for proper installation. Installing a heater requires accurate measurements to ensure no modifications to the ductwork are no need, allowing for a smoother installation process and optimal performance.
If you want to learn more about duct heaters for your needs, here’s a detailed guide for you. Click here.
Essential Prerequisites to Know Before Installing Duct Heaters
Before installing duct heaters, make sure you have the right tools and understand the basic requirements. Let’s go over what you need to know to get started.
Inspection and Preparation
Before you start installing duct heaters, it’s crucial to inspect them for any damage that might have occurred during shipping. Check all the insulators to make sure they aren’t broken and examine the duct heater element wire for any bends or deformations that could lead to a short circuit or grounding issue.
Ensure all fasteners and electrical connections, especially pressure terminals, are tight to prevent any loose connections that could cause problems later.
Orientation of the Heater
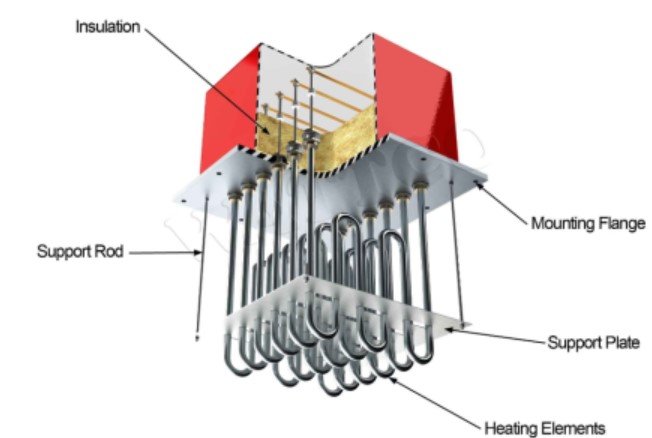
When installing duct heaters, the most important aspect is the orientation of the heater with respect to the axis of the coils. The coil axis must always be horizontal. This means that the termination plate, which is the face or front of the heater, should be mounted to a vertical side of the duct.
This horizontal mounting ensures that the coils can support by the ceramic bushings. If the heater were mounted vertically, the coils could sag and possibly short circuit by touching each other or the ducting.
Spacing and Thermocouple Placement
If your application requires multiple duct heaters, make sure not to mount them too closely together. Leave a few inches between each heater to allow the air to mix or blend before it encounters the next set of heater coils.
For thermocouples that monitor temperature downstream, mount them away from the duct heater to avoid inaccuracies caused by less-mixed, cooler air near the duct walls. Ensure that the thermocouples are long enough to reach well into the duct for accurate temperature readings.
Structural Support and Space Requirements
To install the building or structure where the ductwork and the duct heater must have a foundation and walls capable of supporting the weight of the duct heater.
The area should be large enough to accommodate the duct heater without overcrowding or compromising the building’s structural integrity. Ensure there is sufficient space for proper ventilation to avoid condensation buildup within the duct heaters.
Power Source and Ventilation
For the fans and other HVAC system parts to run on electricity, there needs to be a nearby power source. In order to avoid moisture buildup inside the duct heater, which can result in mold growth and other problems, proper ventilation.
How to Install Duct Heaters Like a Pro?
Ready to install duct heaters? Follow this step-by-step guide to ensure a smooth and successful installation process. We’ll walk you through each stage to make it easy and efficient.